

")
Snowflake sugar cookies are the epitome of winter magic—dainty, intricate, and eye-catching. They’re meant to be the showstoppers of your holiday table, drawing admiration from guests and making you feel like the baking superstar you’ve always aspired to be. But let’s be honest, the road to cookie perfection isn’t always so smooth.
If you’ve ever envisioned pulling out a tray of elegant snowflakes, only to be met with misshapen blobs of dough that look more like abstract art, you’re not alone. Why won’t they hold their shape? What went wrong? Will your winter party dreams melt away faster than snow under a heat lamp?
Don’t worry—there’s hope! With the right guidance, your cookies can skip the doughy disasters and transform into the snowflake masterpieces you were aiming for. In this post, we’ll break down the common mistakes and teach you exactly what to tweak in your recipe and technique to make sure your snowflake cookies bake as flawlessly as you imagined. Ready for your cookie redemption story? Let’s dive in!
Table of Contents
Meet Megan Oliverio: Your Guide to Sugar Cookie Success
If you’ve ever spent hours rolling out dough and carefully cutting intricate cookie shapes, only to watch them turn into unrecognizable blobs in the oven… you’re not alone. I’ve been there, covered in flour and frustration. That’s why I’m on a mission to help bakers just like you succeed!
I’m Megan Oliverio of Sweet Events, and I specialize in teaching home bakers to go from frustrated cookie fails to proud creators of delicious, bakery-worthy sugar cookies. Together, we’ll turn your struggles with spreading dough, lackluster recipes, and overwhelming icing techniques into confidence and skills that you can count on.
If you’ve ever wanted to create stunning cookies that taste as amazing as they look, you’re in the right place. Let’s get started!

The Snowflake Cookie Conundrum
Picture this: a tray of perfectly cut snowflake sugar cookies, decorated with delicate royal icing lines, sitting beautifully at your winter party. Guests are in awe, snapping photos, and asking, “Wow, did you make these yourself?”
Now rewind to reality. You’re pulling mangled blobs of dough out of the oven and muttering under your breath because the intricate snowflakes you spent so much time on baked into shapeless spreads. Sound familiar?
Don’t give up yet—this isn’t the end of your cookie dreams! With a few simple tweaks to your recipe, preparation, and baking technique, you can achieve those beautifully shaped snowflake cookies every single time. Let’s troubleshoot the common pitfalls stopping your cookies from realizing their full potential.
The 4 Most Common Mistakes Behind Cookie Shape Mishaps
Failing cookies can ruin an otherwise fun baking session. Here’s a look at the most common culprits:
- An unreliable recipe: Too much butter or sugar—or even the wrong balance of ingredients—can lead to sticky dough or spreading.
- Overmixing the dough: This activates gluten, making cookies spread and lose their shape.
- Skipping critical chilling steps: Warm dough equals disaster, plain and simple.
- Inaccurate baking techniques: Incorrect oven temperatures, crowding on the baking sheet, or skipping parchment paper can all contribute to misshapen cookies.
Trust me, with a few strategic adjustments, we can fix these issues and avoid future cookie disasters!
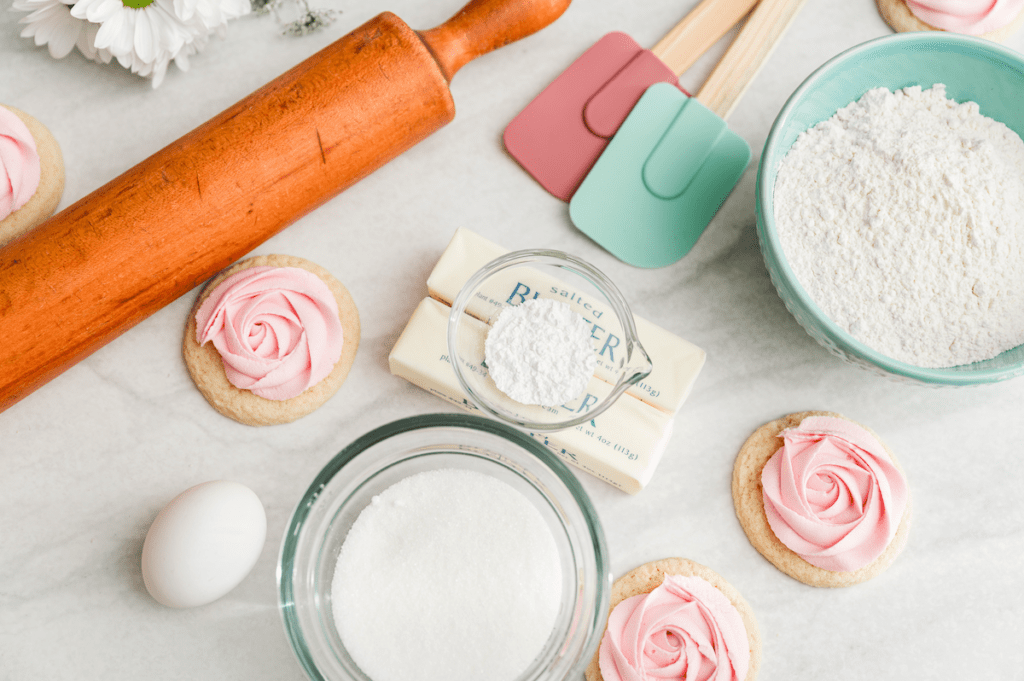
Dough Preparation: Set Yourself Up for Success
1. Start with a Reliable No-Spread Recipe
Your cookie dough is your foundation—if it’s not sturdy, the rest will fall apart (or melt in the oven).
- Aim for a 3:2 butter-to-flour ratio (by weight). This balance ensures a pliable dough that’s not too sticky but still rich in flavor.
- Avoid recipes that have too much sugar or butter—they may taste great, but they’ll bake into sticky puddles instead of holding clean edges.
- Bonus tip: A small addition of cornstarch can improve stability without sacrificing taste!
(Want to skip the guesswork? My foolproof recipe is included in “Baking the Perfect Sugar Cookie,” my online course where I walk you step-by-step through every detail.)
2. Chill Like a Pro
One of the biggest mistakes bakers make is skipping the chilling phase. Why is this so important?
Chilling gives the butter in your dough time to firm up. When chilled dough hits the oven, the butter melts at a slower rate, holding your cookie shape intact.
👉 How to chill properly:
- After mixing, wrap your dough tightly in plastic wrap and refrigerate for at least two hours.
- If shaping and cutting dough, chill your cutouts again for 10-15 minutes before baking.
Pro Tip: If you’re short on time, you can freeze the dough instead! Just flush out all the air in your wrap to prevent freezer burn.
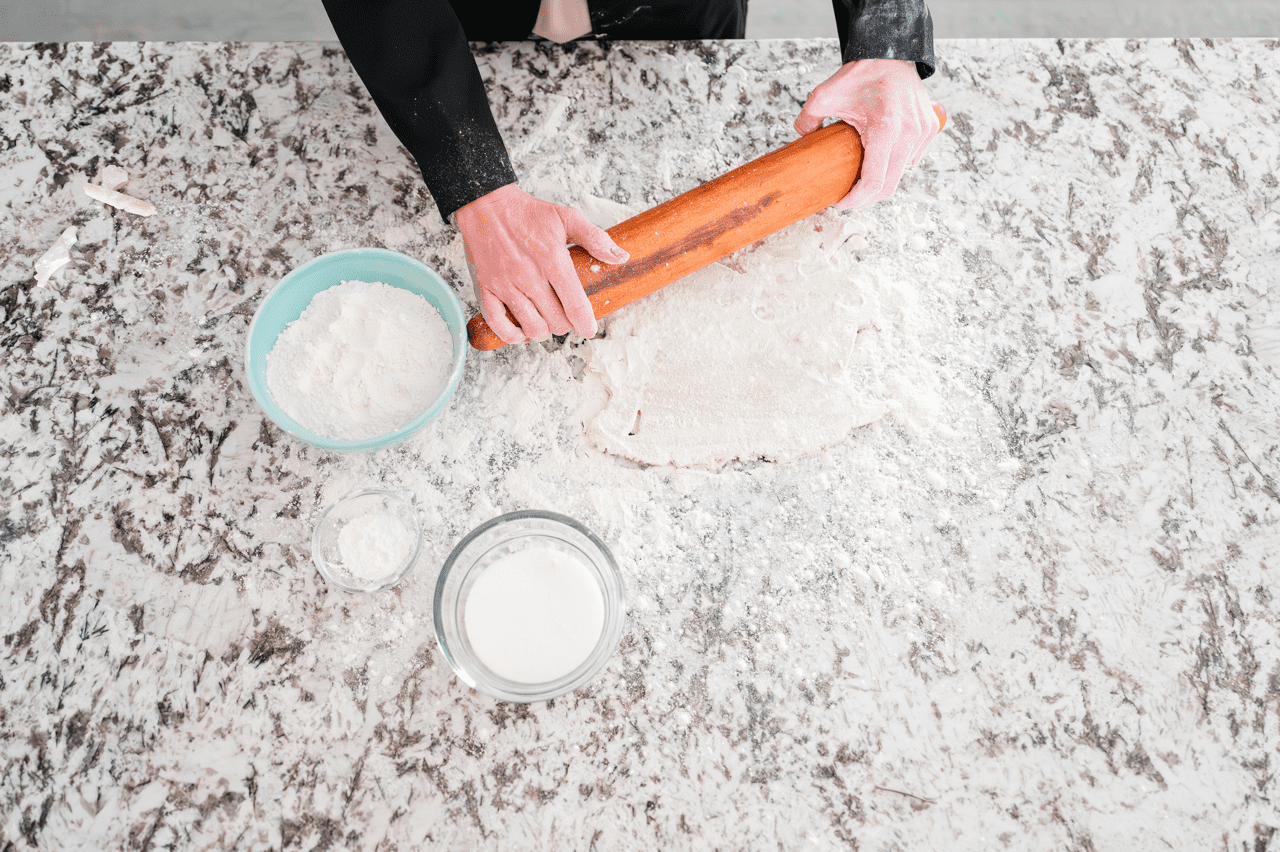
3. Roll with Precision
Rolling your dough to an uneven thickness is another sneaky cause of spreading. The edges bake faster, leaving the centers underdone and prone to spreading.
- Use rolling guides to keep your dough between ¼ to ⅜ inch thick.
- A silicone mat provides a non-stick surface that prevents tears and helps maintain even thickness throughout.
- Once you’ve rolled and cut your cookies, use an offset spatula to gently transfer them to a baking sheet—no stretching or smushing!
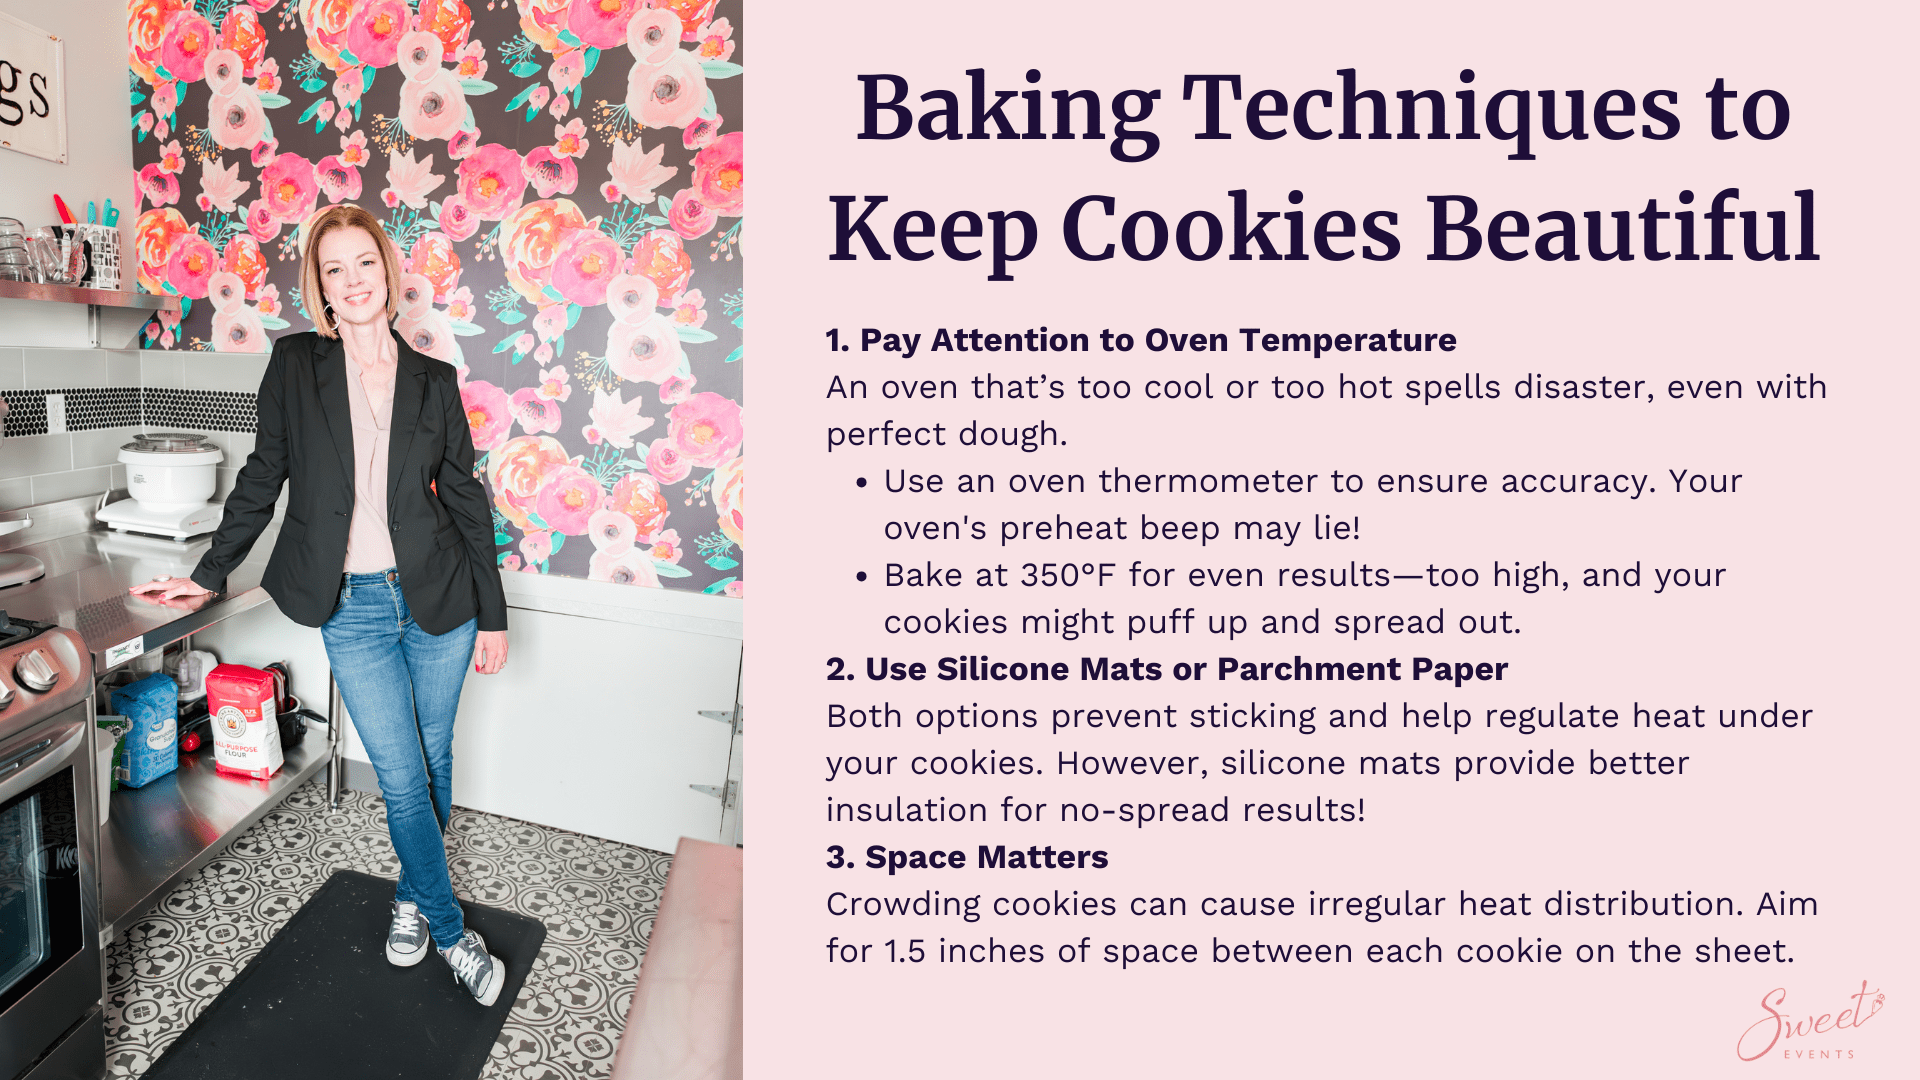
Baking Techniques to Keep Cookies Beautiful
1. Pay Attention to Oven Temperature
An oven that’s too cool or too hot spells disaster, even with perfect dough.
- Use an oven thermometer to ensure accuracy. Your oven’s preheat beep may lie!
- Bake at 350°F for even results—too high, and your cookies might puff up and spread out.
2. Use Silicone Mats or Parchment Paper
Both options prevent sticking and help regulate heat under your cookies. However, silicone mats provide better insulation for no-spread results!
3. Space Matters
Crowding cookies can cause irregular heat distribution. Aim for 1.5 inches of space between each cookie on the sheet.
Let’s Fix Those Frustrating Mistakes
What if you’ve already tried everything, but your cookies still spread? This could mean your dough needs tweaking or your oven’s heat is uneven. Don’t give up! Baking takes trial and error, but every repair attempt gets you closer to achieving flawless cookies.
And remember, sometimes all it takes is a little extra guidance, which is where I can help!
Ready to Bake with Expert Tips?
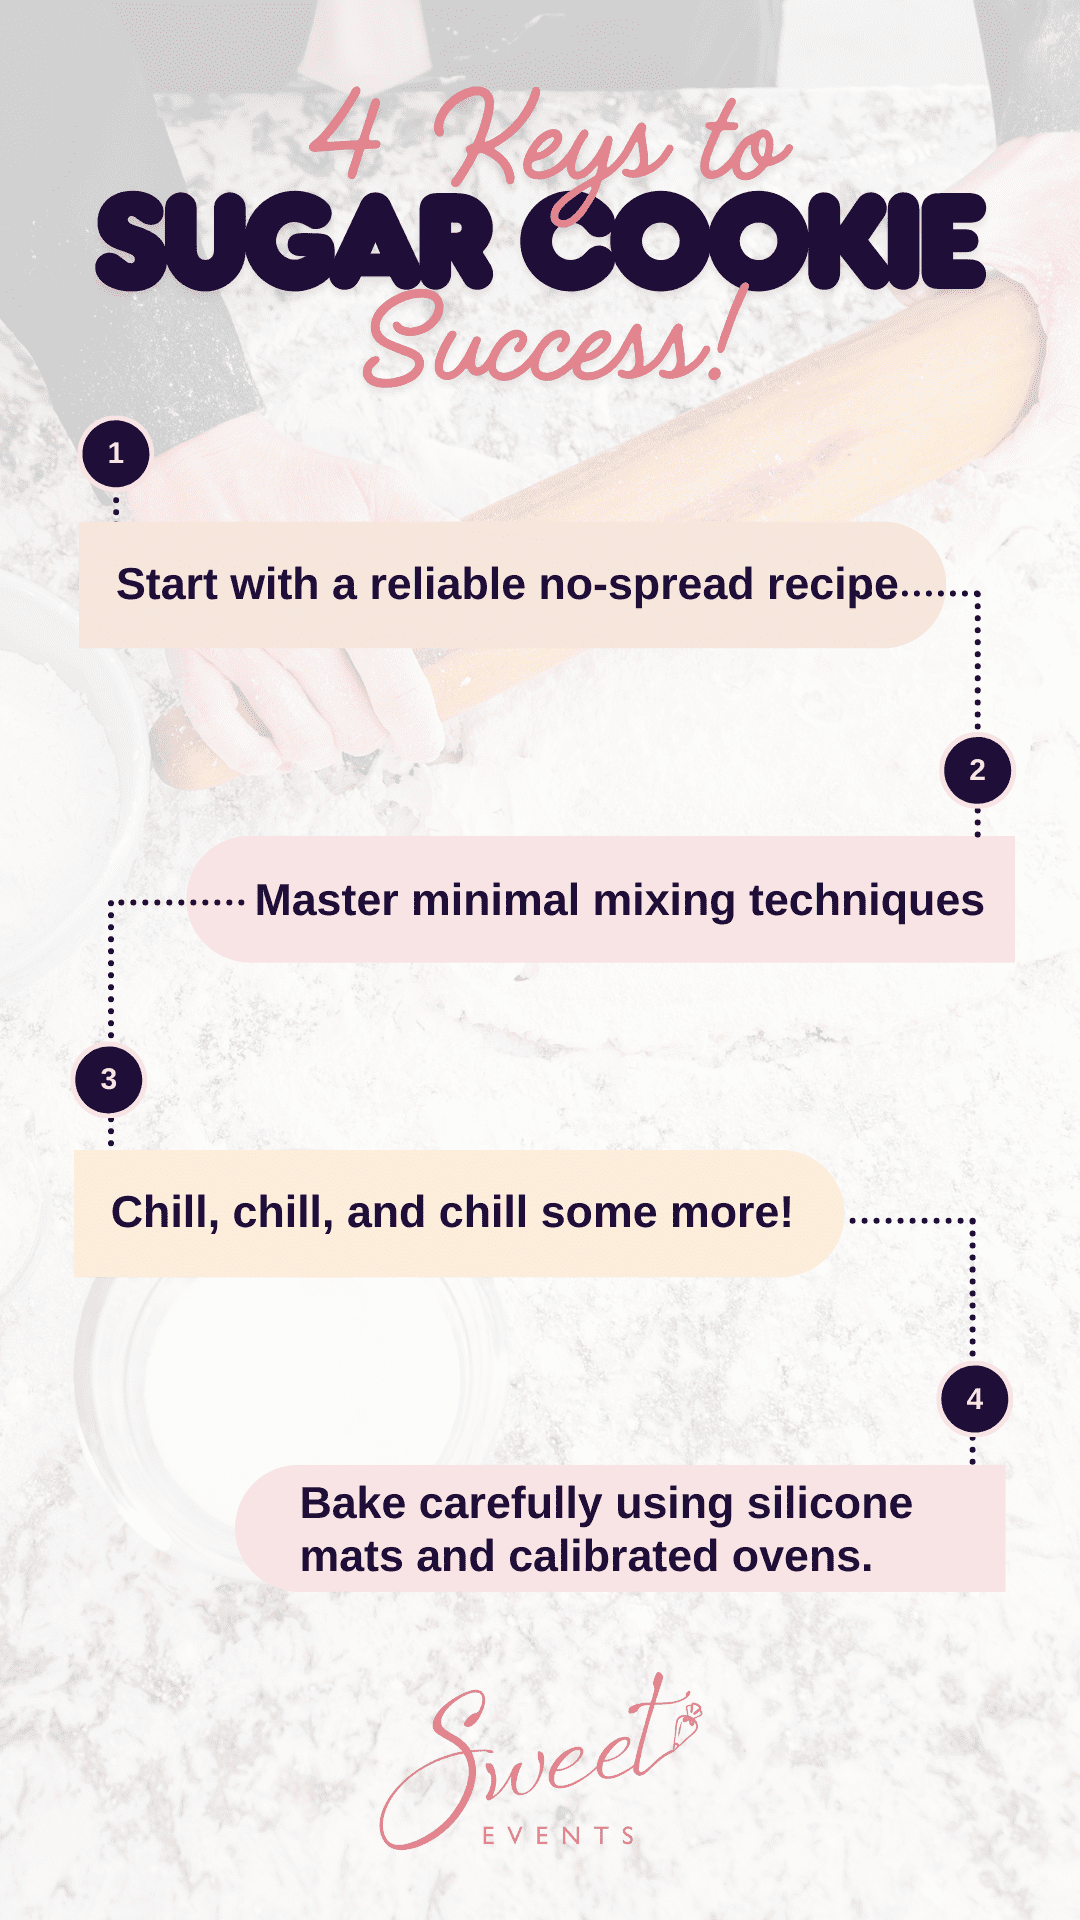
With the right techniques, you can bake stunning cookies that taste even better than they look. Let’s recap:
The 4 Keys to Cookie Success:
- Start with a reliable no-spread recipe.
- Master minimal mixing techniques.
- Chill, chill, and chill some more!
- Bake carefully using silicone mats and calibrated ovens.
Each of these steps builds upon the last, leading to consistently perfect snowflake sugar cookies.
Turn Your Frustration Into Sweet Success with My Online Cookie Course
If you’re ready to take your cookie game to the next level (and skip all the trial-and-error stress), I invite you to join my Online Cookie Course, “Baking the Perfect Sugar Cookie.”
Here’s what you’ll gain:
- My foolproof no-spread sugar cookie recipe that guarantees delicious results every time.
- Step-by-step video tutorials where I’ll show you exactly how to roll, mix, chill, and bake like a pro.
- Expert troubleshooting tips for every common cookie problem—including the ones you didn’t even realize were holding you back.
- Bonus lessons on icing techniques, flavor enhancements, and time-saving tricks!
✨ With just a little practice, you’ll be baking cookies that look like they belong on display at a high-end bakery (and maybe even launching your own cookie business!).
Ready to start your cookie journey?
Stop settling for frustrating results and start creating cookies you’ll be proud to share.
Click here to enroll in “Baking the Perfect Sugar Cookie” now!
Have questions or tips to share? Drop them in the comments below—I’d love to hear about your cookie-making adventures!


0 Comments